🔑 Prerequisites
-
Access to the HP MFP Embedded Web Server (EWS)
-
Administrator login credentials
-
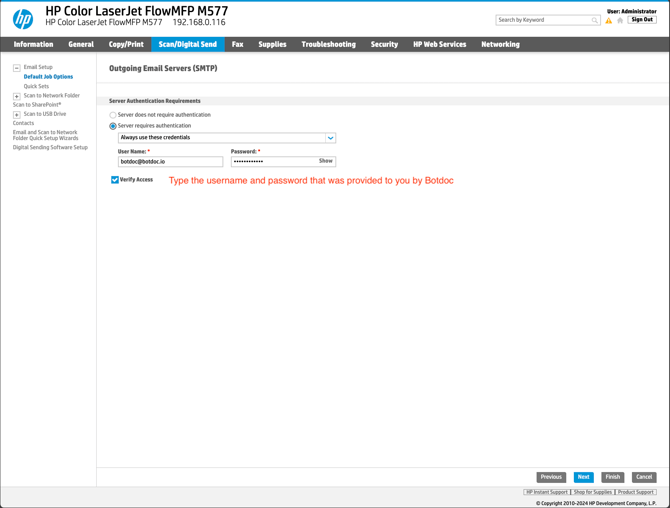
Botdoc SMTP username and password (provided by Botdoc support)
- GoDaddy Class 2 Certification Authority Root Certificate file (.der format) - Download at https://aboutssl.org/go-daddy-root-certificates/
1️⃣ Download the GoDaddy Root Certificate
Before configuring SMTP, you must install the GoDaddy Root CA certificate.
-
Go to: GoDaddy Root Certificates - https://aboutssl.org/go-daddy-root-certificates/
-
Download the GoDaddy Class 2 Certification Authority in DER format.
-
File will look like: gd-class2-root.cer
-
2️⃣ Upload the Certificate to the HP MFP
-
In the EWS menu, go to:
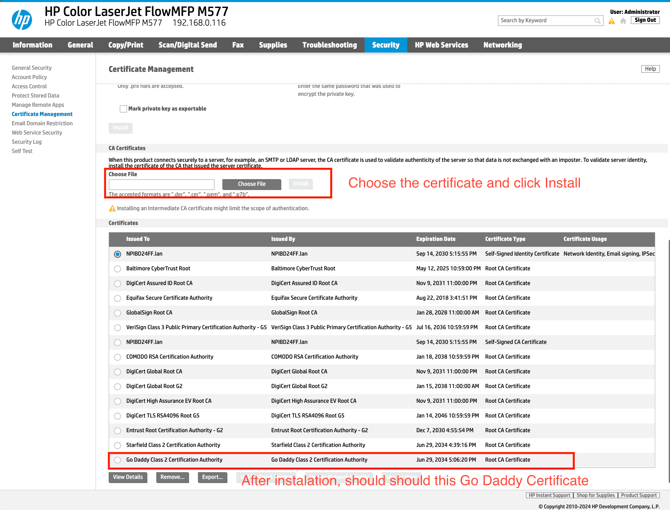
Security → Certificate Management
-
Under CA Certificates, click Choose File and select the downloaded certificate.
-
Click Install.
-
After installation, verify that GoDaddy Class 2 Certification Authority appears in the certificate list.
3️⃣ Add SMTP Credentials
-
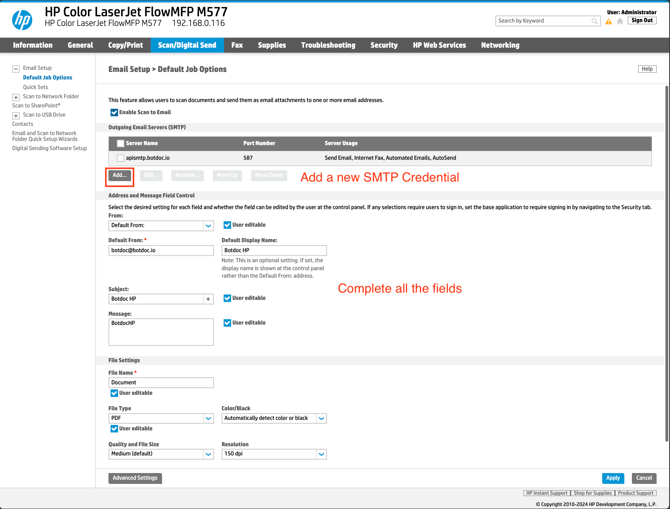
Go to: Scan/Digital Send → Outgoing Email Servers (SMTP)
-
In the same menu, click Add to create a new SMTP credential.
4️⃣ Configure SMTP Server
-
Select I know my SMTP server address or host name and enter:
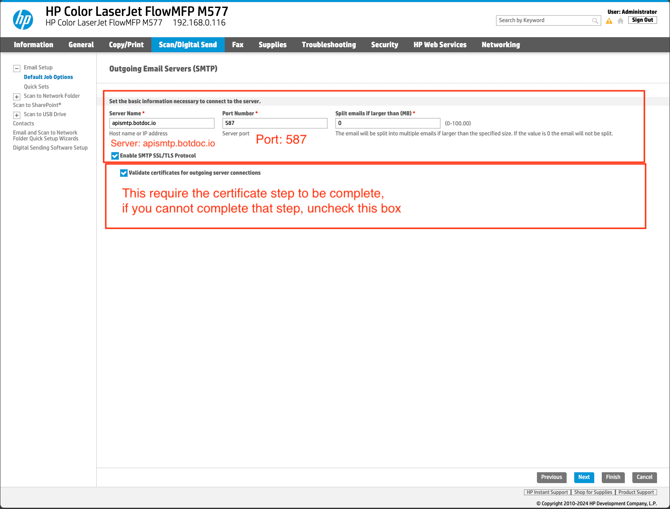
Server: apismtp.botdoc.io
Port: 587-
Check Enable SMTP SSL/TLS Protocol.
-
Check Validate certificates for outgoing server connections.

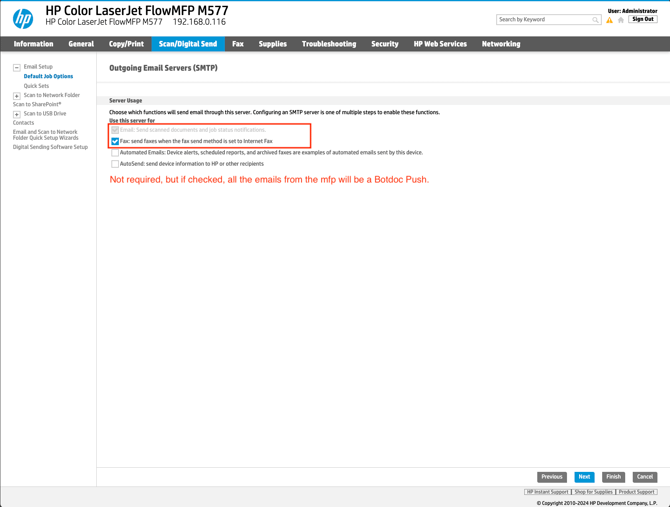
5️⃣ Configure Server Usage
You may choose which functions will use this SMTP server:
-
✅ Email & FAX (recommended)
-
❌ Automated Emails (optional, only if required)
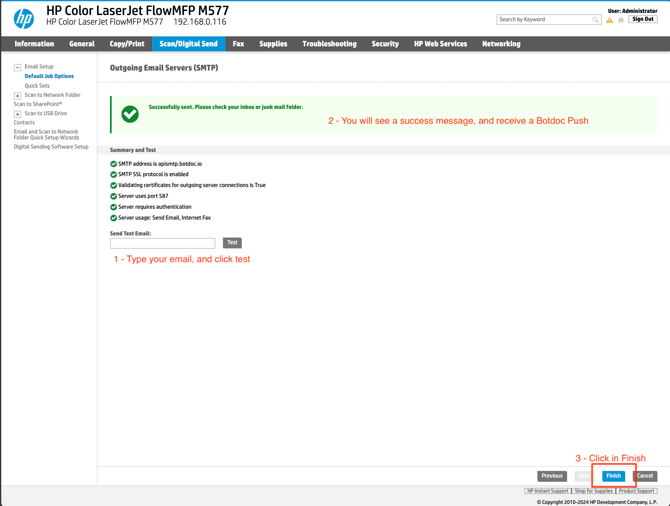
6️⃣ Test & Verify
-
Go to the Summary and Test screen.
-
Enter your email address and click Test.
-
You should see a ✅ Success message and receive a Botdoc Push.
-
Click Finish to save the configuration.
🎉 Done!
Your HP MFP is now configured to send scanned documents via Botdoc securely.