🔑 Prerequisites
-
Access to the Lexmark Embedded Web Server (EWS)
-
Administrator login credentials
-
Botdoc SMTP username and password (provided by Botdoc support)
- GoDaddy Class 2 Certification Authority Root Certificate file (.pem format) - Download at https://aboutssl.org/go-daddy-root-certificates/
1️⃣ Install the GoDaddy Root Certificate
Before configuring SMTP, the Lexmark must trust the GoDaddy Class 2 Certification Authority Root Certificate
-
Go to: GoDaddy Root Certificates https://aboutssl.org/go-daddy-root-certificates/
-
Download the GoDaddy Class 2 Certification Authority in DER or PEM format.
-
File name example: gd-class2-root.cer
-
-
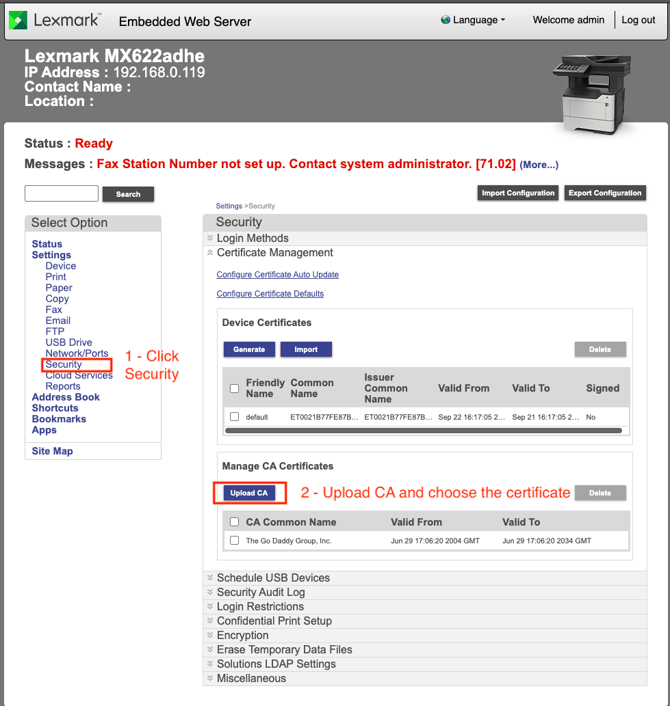
Open the Lexmark EWS in your browser.
-
Go to Security → Certificate Management.
-
Under Manage CA Certificates, click Upload CA and select the certificate file.
-
Verify that The GoDaddy Group, Inc. appears in the list.
2️⃣ Configure SMTP Server
-
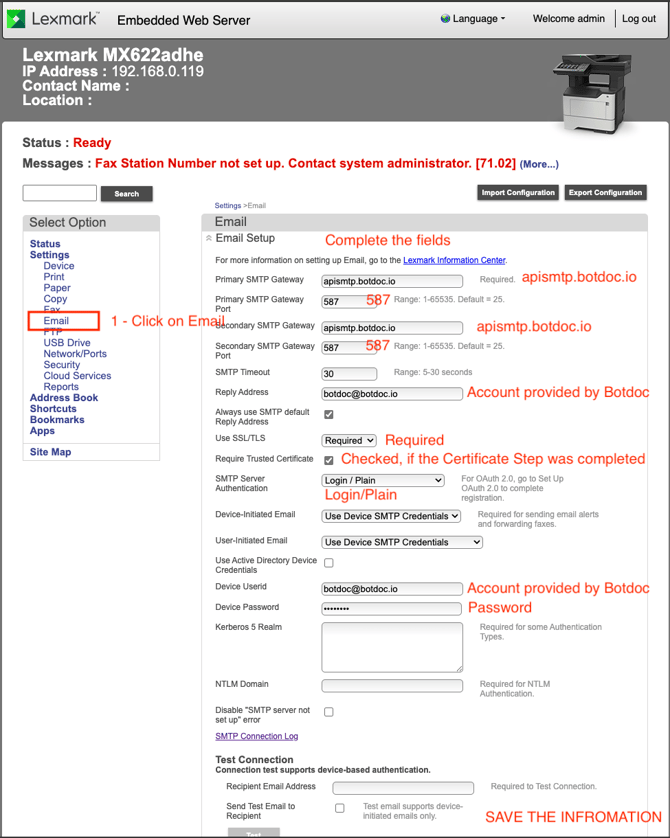
In the EWS menu, click Email.
-
Complete the fields as follows:
-
Primary SMTP Gateway: apismtp.botdoc.io
-
Port: 587
-
Reply Address: Botdoc email account provided to you
-
Use SSL/TLS: Required
-
Require Trusted Certificate: ✅ Checked (after completing certificate step)
-
SMTP Server Authentication: Login / Plain
-
Device Credentials: Use credentials provided by Botdoc (username@botdoc.io + password)
-
-
Save the settings.
3️⃣ Test the Configuration
To test:
-
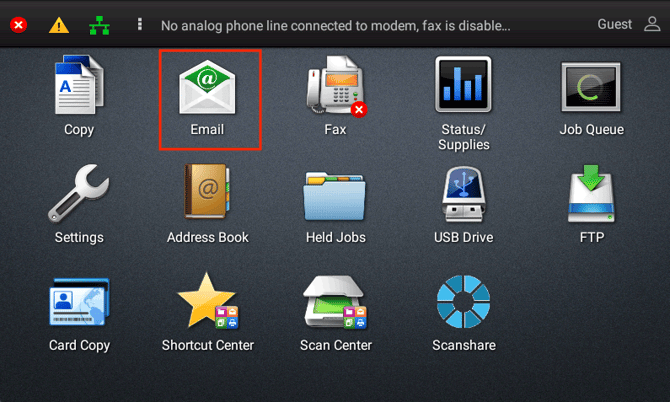
Go to the Lexmark printer control panel.
-
Select the Email option.
-
Scan a document and send it to your email.
-
You should receive the file via Botdoc SMTP.
-
If it does not work, return and check the SMTP Connection Log for more information, or disable the “Require Trusted Certificate”
🎉 Done!
Your Lexmark MFP is now configured to send scanned documents securely via Botdoc.