Prerequisites
-
Access to the Sharp MFP web interface (via IP address)
-
Administrator credentials
-
Botdoc SMTP username and password
Step 1: Import the CA Certificate
-
Log in to the Sharp web interface as Administrator.
-
Navigate to:
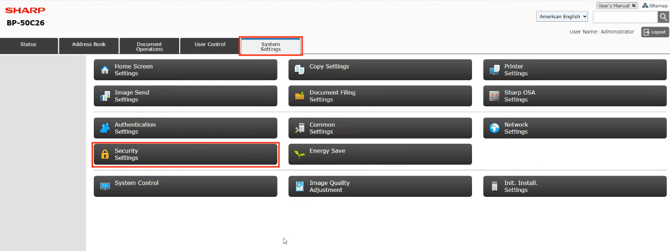
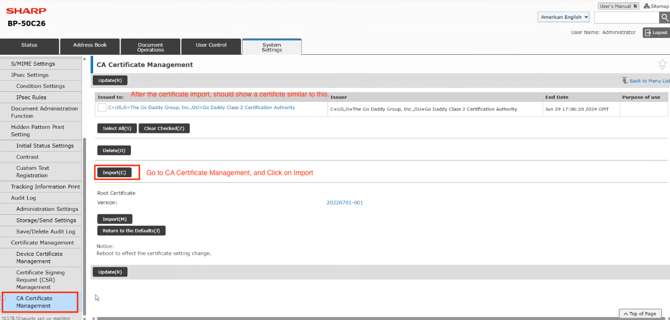
System Settings → Security Settings → CA Certificate Management
- Go to the Botdoc-recommended certificate page: https://aboutssl.org/go-daddy-root-certificates/
- Download the GoDaddy Class 2 Certification Authority Root Certificate (PEM/.crt format)
- Click Import on the MFP Admin portal.
-
Upload the downloaded certificate file to the device.
-
After import, confirm that the certificate appears in the list.
-
Reboot the device if prompted to apply certificate changes.
Step 2: Open Network Settings
-
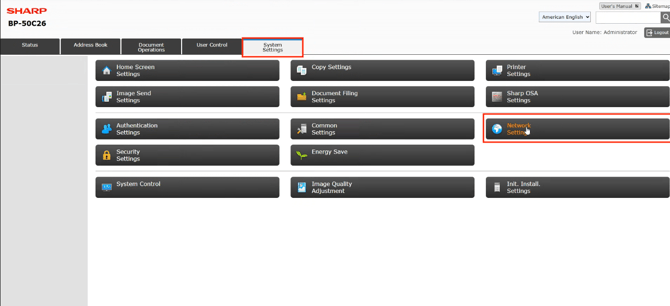
Go to System Settings.
-
Click Network Settings to access SMTP configuration.
Step 3: Configure SMTP Settings
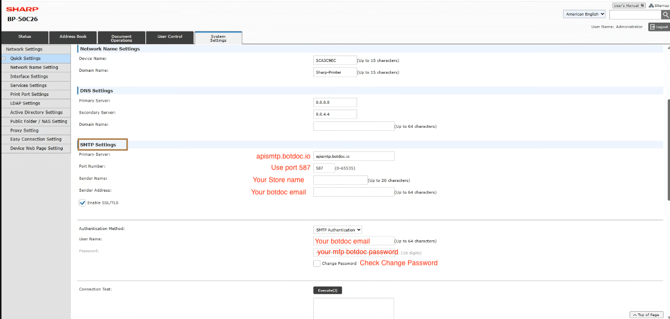
Under SMTP Settings, enter the following values:
|
Setting |
Value |
|---|---|
|
Primary Server |
apismtp.botdoc.io |
|
Port Number |
587 |
|
Sender Name |
Your store or company name |
|
Sender Address |
Your Botdoc email |
|
Enable SSL/TLS |
Enabled |
|
Authentication Method |
SMTP Authentication |
|
User Name |
Your Botdoc email |
|
Password |
Your Botdoc password |
|
Change Password |
Checked (when setting password) |
After completing all fields:
-
Click Save.
-
Use the Execute button under Connection Test to verify connectivity.
- Save and Reboot the device.
Step 4: Verify Email Functionality
If the Connection Test succeeds:
-
Go to the Sharp MFP control panel.
-
Use Scan to Email to send a test document.
-
Confirm the email is delivered successfully.
Done!
Your Sharp BP-50C26 is now configured to securely send emails using Botdoc SMTP, with TLS enabled and certificate validation in place.