🔑 Prerequisites
-
Access to the Xerox Embedded Web Server (EWS)
-
Administrator login credentials
-
Botdoc SMTP username and password (provided by Botdoc support)
-
GoDaddy Class 2 Certification Authority Root Certificate file (.der format) - Download at https://aboutssl.org/go-daddy-root-certificates/
Install the GoDaddy Root Certificate
Before configuring SMTP, the Xerox MFP must trust the GoDaddy Root Certificate.
-
Go to the printer’s IP address in your browser (e.g., http://192.168.x.x).
-
Log in as Admin.
-
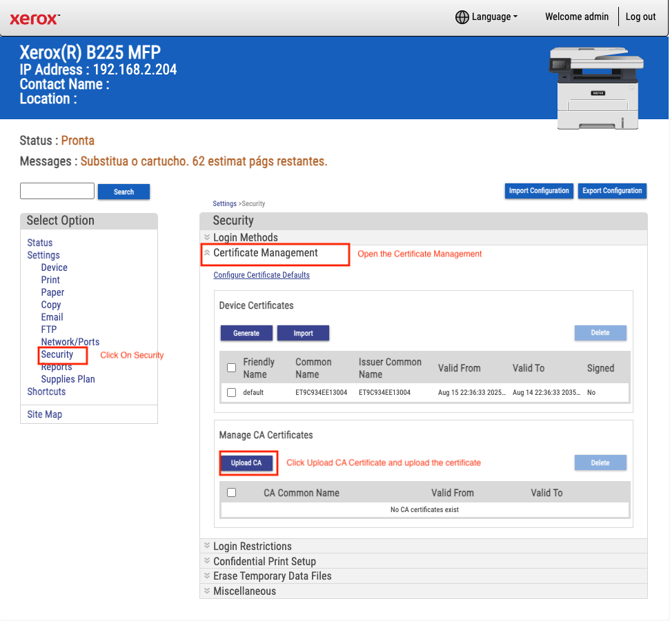
In the left menu, click Security → Certificate Management.
-
Under Manage CA Certificates, click Upload CA.
-
Choose the GoDaddy Class 2 Certification Authority Root Certificate certificate file (download it from GoDaddy Root Certificates https://aboutssl.org/go-daddy-root-certificates/, in DER format).
-
After uploading, the certificate will appear in the list of CA Certificates.
Configure SMTP Settings
-
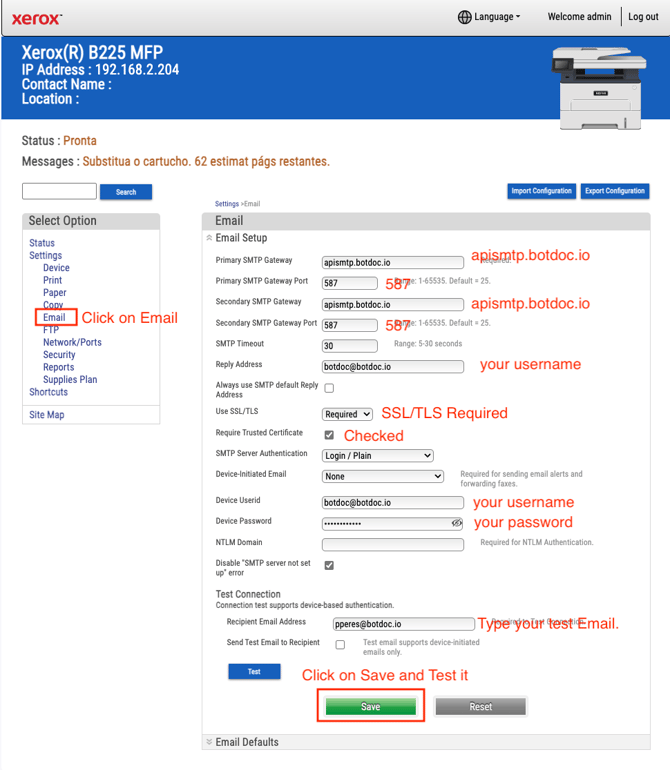
In the left menu, click Email.
-
Complete the following fields:
-
Primary SMTP Gateway: apismtp.botdoc.io
-
Primary SMTP Gateway Port: 587
-
Secondary SMTP Gateway: apismtp.botdoc.io
-
Secondary SMTP Gateway Port: 587
-
SMTP Timeout: 30
-
Reply Address: your Botdoc email address
-
Use SSL/TLS: Required
-
Require Trusted Certificate: ✅ Checked
-
SMTP Server Authentication: Login / Plain
-
Device User ID: (your Botdoc username)
-
Device Password: (your Botdoc password)
-
Test Recipient Email Address: your email
-
-
Click Save, then Test to validate the connection.
Test and Verify
-
After clicking Test, a confirmation window should display:
✅ “SMTP setup successful.”
-
Click OK to finish.

🎉 Done!
Your Xerox MFP is now fully configured to send emails securely through Botdoc SMTP using TLS encryption and a trusted GoDaddy Root Certificate.