![logo_full_orange@3x (1).png]](https://support.botdoc.io/hs-fs/hubfs/logo_full_orange@3x%20(1).png?height=40&name=logo_full_orange@3x%20(1).png)
⚠️This is an Enterprise feature. This guide is only for organizations that already use Single Sign-On with Botdoc. If you don't use SSO, you can safely ignore this article.
We are moving Single Sign-On to a new, more secure identity provider. To keep your team signing in without interruption, your organization needs to make a small update on your side (in Google Workspace, Azure AD, Okta, or whichever provider you use) and then confirm the change inside Botdoc.
This is a one-time change. You don't need to write any code, and the whole process usually takes just a few minutes.
Please complete this before July 31. Your current sign-in will keep working until you finish, so there's no rush to do it this second, but we recommend not leaving it until the last day.
Before you start:
-
You must be signed in as the Organization Owner. Only the owner can complete the final "Confirm Changes" step.
- You'll need access to your Identity Provider's admin settings, the same place where you originally set up SSO (Google Workspace Admin, Azure, Okta Admin, etc.). If you're not sure where to find these settings, contact Botdoc Support and we'll help you find the right values.
- Set aside about 5 minutes and do this when you're able to test signing in afterward.
Step 1:
When SSO needs updating, you'll see an orange "Action required" banner at the top of your Dashboard.
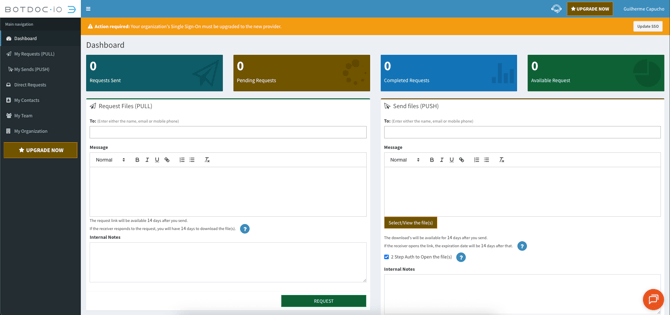
Click the Update SSO button on the right side of that banner.

(You can also get there any time by going to My Organization and scrolling to the yellow Action Required box.)
Step 2:
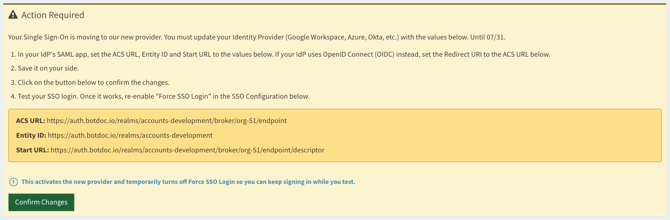
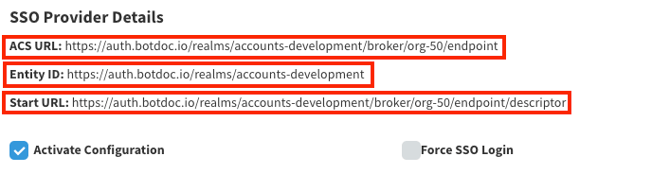
In the yellow Action Required box you'll see three values that are unique to your organization:
-
ACS URL
-
Entity ID
-
Start URL
Keep this page open, you'll copy these into your Identity Provider in the next step. Don't worry about what they mean, think of them as the new "address" your provider needs to point to.
Step 3:
Open the admin settings for your SSO provider (Google Workspace, Azure, Okta) and update your existing Botdoc app with the new values.
-
Google Workspace go to: Google Admin Console -> Web and mobile apps -> find the previously created application to edit PROBABLY NAME.
-
Azure or Microsoft Entra go to: Azure Portal -> Microsoft Entra ID (Azure Active Directory) -> App Registrations
-
Okta go to: Okta Admin Console -> Applications and find the previously created application to edit.
If your provider uses SAML:
If you are using SAML with Microsfot Entra, please be sure to review the Attributes & Claims Mapping Listed on the tutorial
You'll open your existing Botdoc SAML app in your provider and update three values with the ones from Botdoc
The steps below use Google Workspace Admin as the example.
- Go to the Google Admin Console (admin.google.com).
-png.png?width=670&height=284&name=image%20(3)-png.png)
- Open Apps → Web and mobile apps.
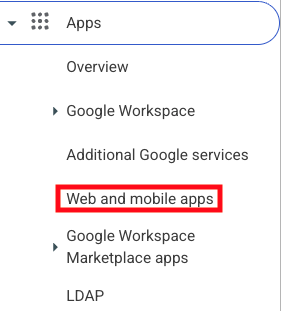
- Click your existing Botdoc SAML app.
.png?width=670&height=226&name=SAML%20XML%20Metadata%20(2).png)
- Open Service provider details
.png?width=670&height=258&name=SAML%20XML%20Metadata%20(3).png)
- Update the ACS URL, Entity ID, and Start URL with the values from Botdoc, then click Save.
The steps below use Okta Admin Console as the example.
- Sign in to the Okta Admin Console.
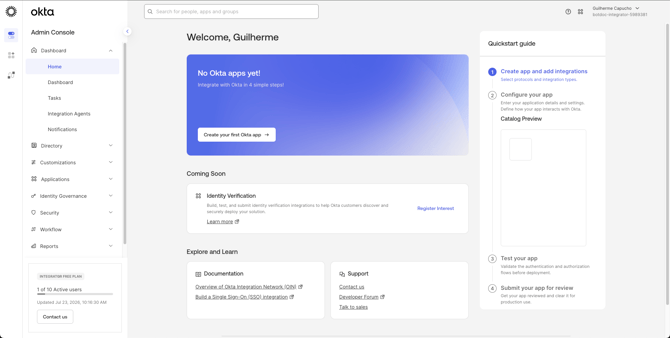
- Open Applications → Applications and click your existing Botdoc app.
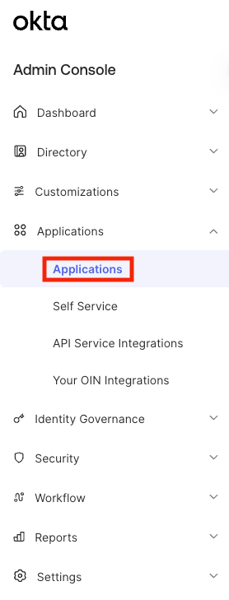
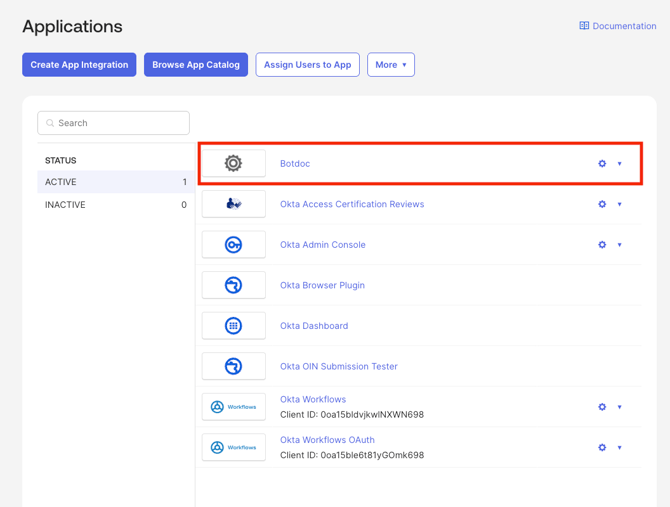
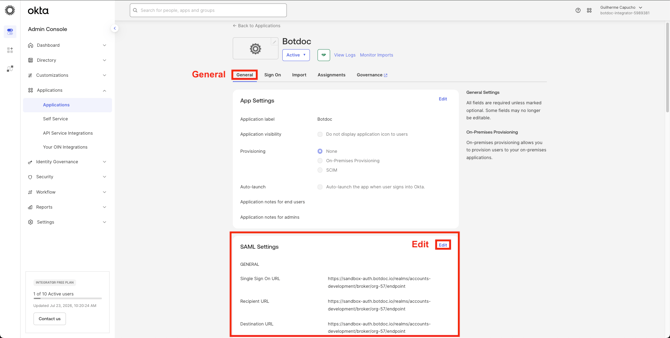
- Go to the General tab and, in SAML Settings, click Edit.
- Continue to the Configure SAML step and update:
- Single sign-on URL → the ACS URL from Botdoc
- Audience URI (SP Entity ID) → the Entity ID from Botdoc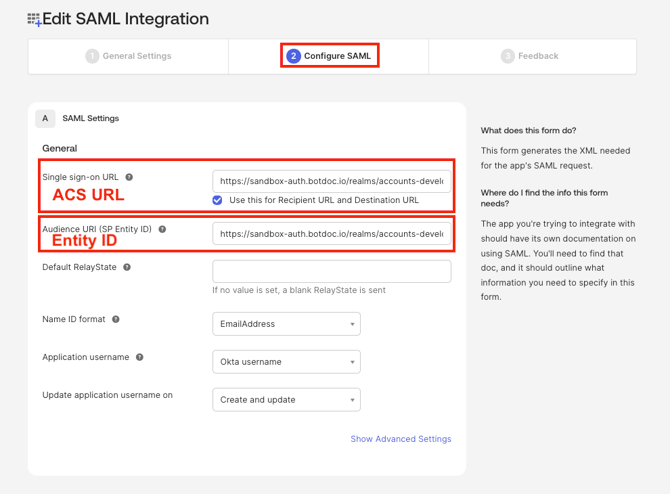
- Click Next, then Finish to apply the changes.
(Full walkthrough: Retrieving SAML XML Metadata from Okta.)
If your provider uses OpenID Connect (OIDC):
For OIDC you'll do two things in your provider:
-
Point the Redirect URI at Botdoc's ACS URL
-
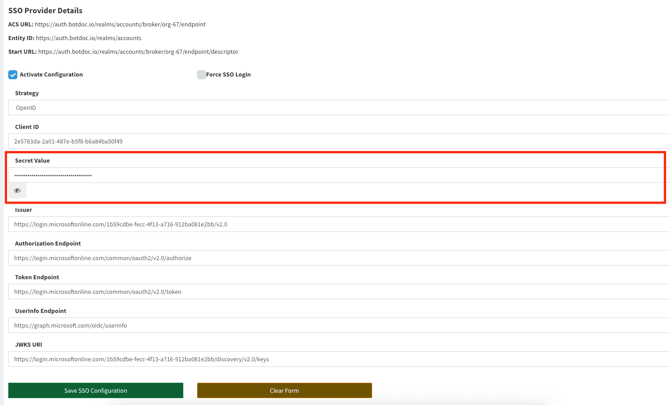
Create a new client secret and copy its Secret Value into Botdoc.
The steps below use Microsoft Entra ID as the example.
Update the Redirect URI:
- Sign in to the Azure Portal and open Microsoft Entra ID (Azure Active Directory), In the left menu, click App registrations.
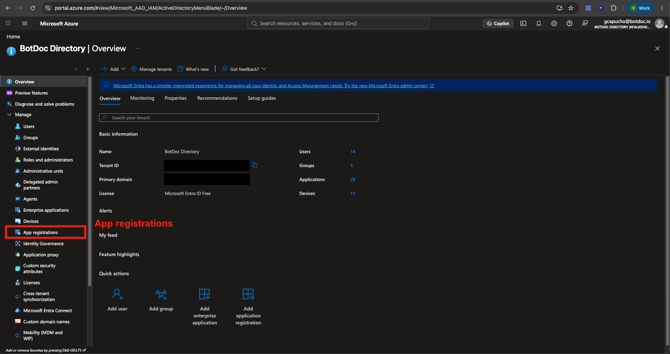
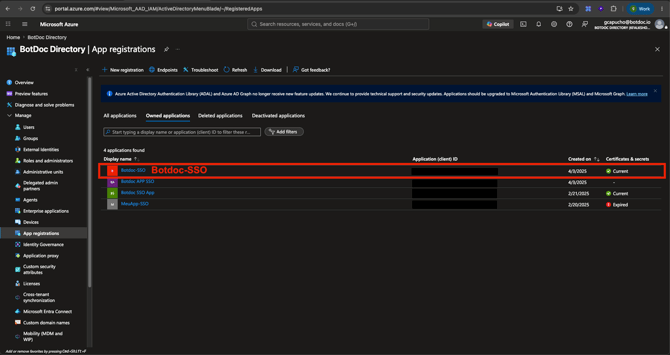
- Open your Application used in the Botdoc App (for example, "Botdoc-SSO").
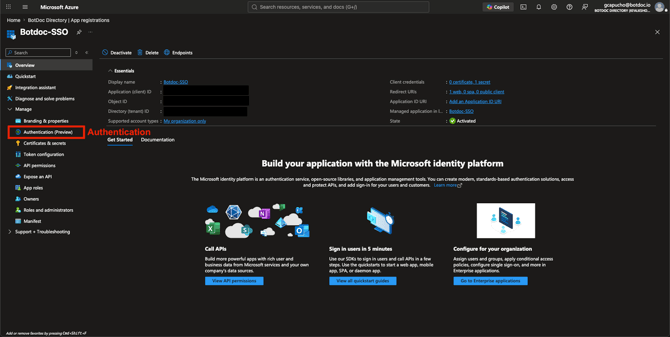
- In the left menu, under Manage, click Authentication.
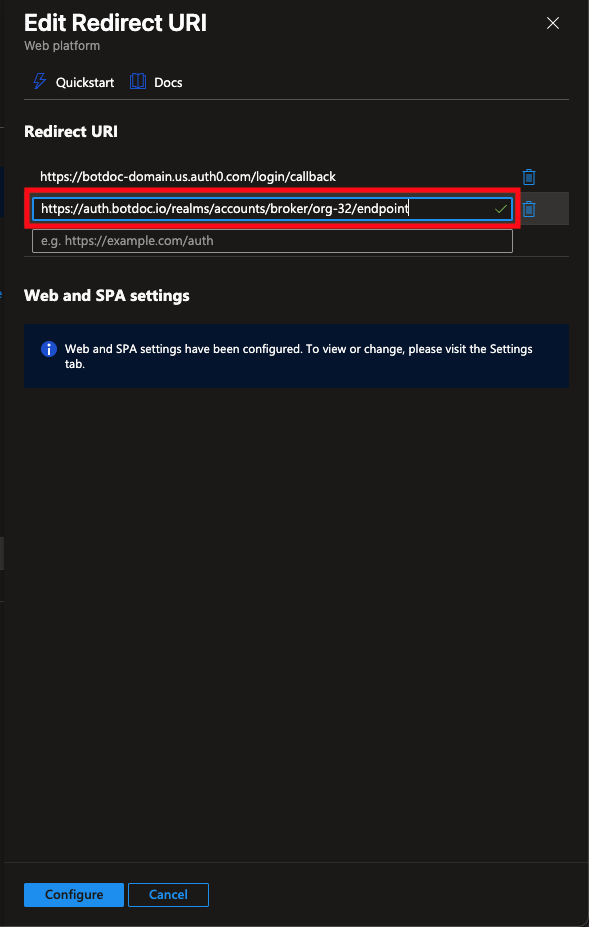
- Under Platform Type → Web, find your existing Redirect URI and click Edit.
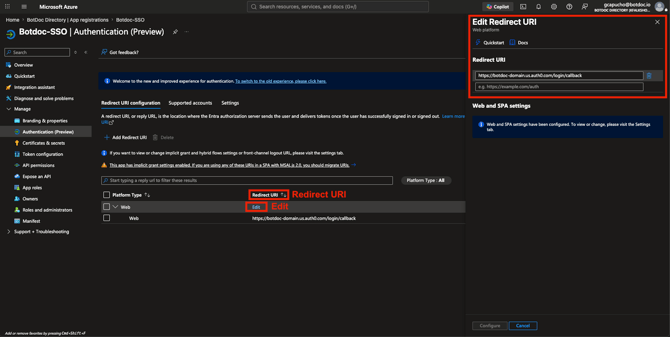
- Add a new Redirect URI with the ACS URL shown in Botdoc (or replace the existing one), then click Configure.
Create a new client secret and copy its Value:
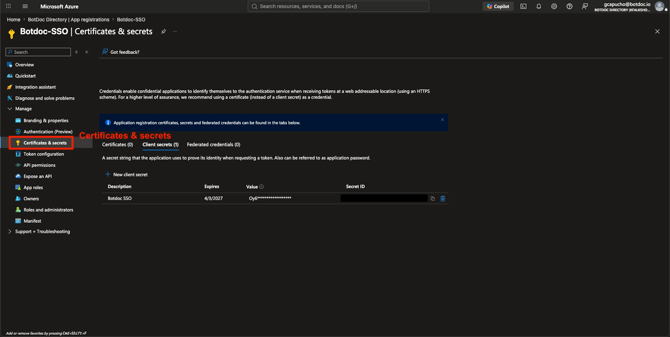
- In the same app, under Manage, click Certificates & secrets.
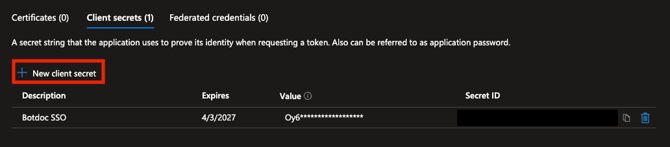
- On the Client secrets tab, click + New client secret.
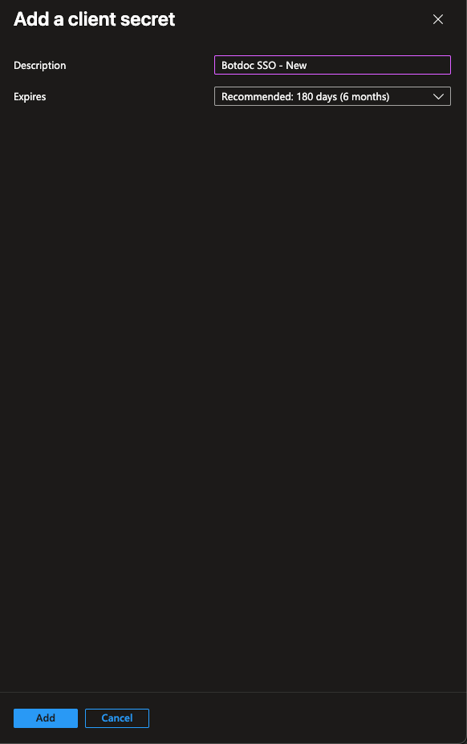
- Enter a Description (for example, "Botdoc SSO") and choose an expiration, then click Add.
- Azure now shows the new secret with two columns, Copy the Secret Value right away for security, Azure only shows the Value once.

- Paste that Value into the Secret Value field in Botdoc SSO Configuration section.
Step 4:
Save the settings on your provider's side. This part happens entirely in your Identity Provider, nothing to save in Botdoc yet.
Step 5:
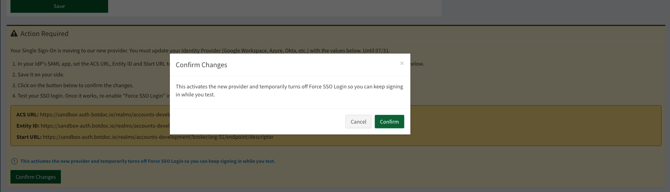
Go back to the Botdoc Action Required box and click Confirm Changes.
What this does:
It activates the new provider for your organization and temporarily turns off "Force SSO Login" so you can still sign in with your email and password while you test. Your old settings are not deleted.
How to confirm it worked:
-
-
The SSO Provider Details section will now show the new provider's values, starting with auth.botdoc.io, If you see those, the update went through.
-
- The yellow Action Required box and the orange dashboard banner will disappear once the migration is complete.
Before you test, confirm your provider still sends the essentials:
- Your email, first name, and last name are in the SSO response.
- The Unique User Identifier (Name ID) is in email format (not "persistent"/opaque).
Not sure? See the guide for your provider — Azure, Google Workspace, or Okta.
Step 6:
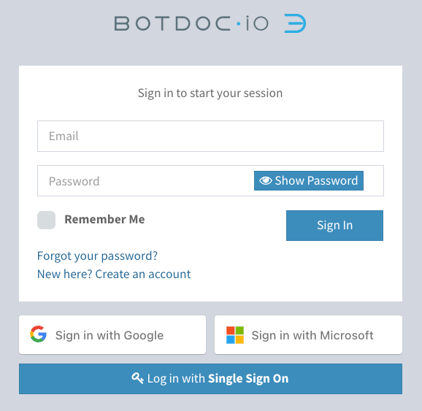
Sign out and sign back in using your Single Sign-On (SSO), ideally in a private/incognito window so you're testing a fresh session.
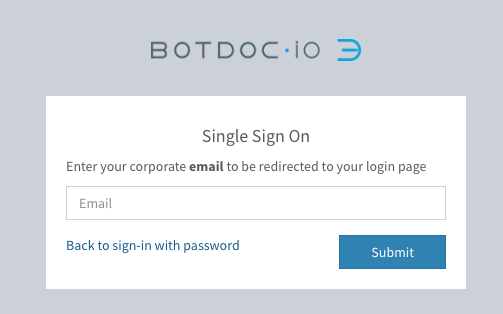
- On the sign-in page, choose Single Sign-On, enter your corporate email, and click Submit:
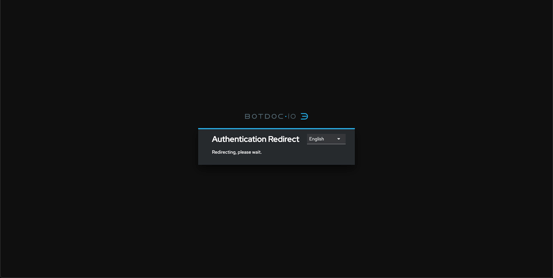
- You'll briefly see an "Authentication Redirect, Redirecting, please wait" screen.
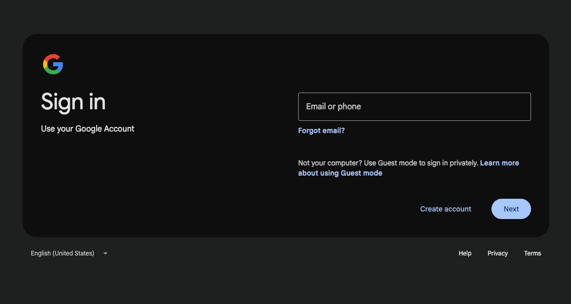
- You'll be sent to your own provider's sign-in page (for example, Google, Microsoft, or Okta). Sign in there as usual.
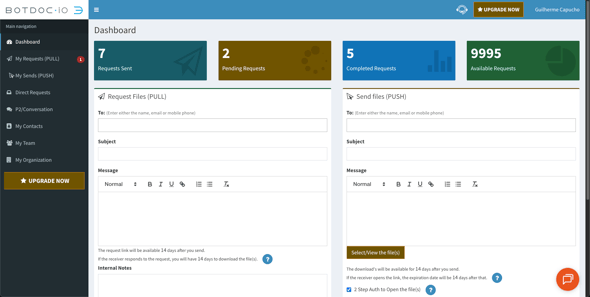
- You should land back on your Botdoc Dashboard, signed in. That means the new SSO is working.
-
It works? Great, continue to Step 7.
- It doesn't work? Double-check that the three values in Step 3 were copied exactly (no extra spaces) and that you saved them in your provider. Because Force SSO Login is temporarily off, you can still get back in with your email and password to fix things. Still stuck? Contact Botdoc Support.
If, after authenticating with your provider, you're returned to the Botdoc login page, see "invalid email or password", or are asked to review your profile — your IdP isn't sending your email.
| What the user sees | Most likely cause | Fix |
|---|---|---|
| Returned to the login page, or "invalid email or password", after authenticating with the IdP | The IdP didn't send an email | Name ID isn't in email format, or the email claim is sourced from an empty attribute |
| Asked to "review / update your profile" | Email or name missing | Populate First/Last name; confirm the email claim has a value |
| First and last names appear swapped | givenname / surname sources are inverted | Set givenname ← user.givenname and surname ← user.surname |
| Works for some users, fails for others | Those users have empty mail / name fields in the directory | Fill the directory fields, or source the email from the UPN |
Step 7:
Once SSO sign-in works, scroll to the SSO Configuration section and turn Force SSO Login back on, then save.
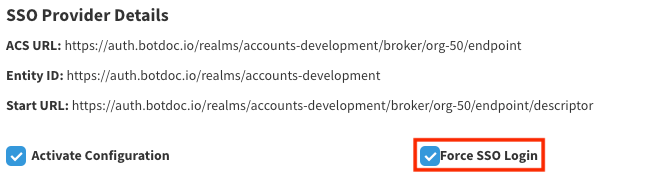
This step is not automatic. Until you re-enable it, members can still sign in with email and password instead of SSO. Turning it back on restores your organization's SSO only sign-in policy.
That's it, you're migrated! ✅