![logo_full_orange@3x (1).png]](https://support.botdoc.io/hs-fs/hubfs/logo_full_orange@3x%20(1).png?height=40&name=logo_full_orange@3x%20(1).png)
This tutorial walks you through creating a SAML Enterprise Application in Microsoft Entra ID (Azure Active Directory) and retrieving the Federation Metadata XML you need to enable Single Sign-On with Botdoc.
Before you begin, make sure you have:
-
An Azure / Microsoft Entra ID account with permission to create Enterprise Applications.
-
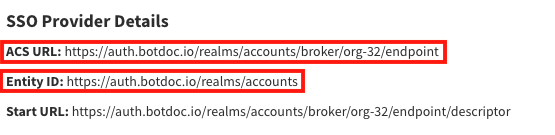
The Botdoc SSO Configuration screen open for your organization, you will copy the ACS URL and Entity ID from it.
-
Access the Azure Portal
Visit the Azure Portal and log in with your credentials.
Navigate to Azure Active Directory
Navigate to Microsoft Entra ID → Enterprise applications.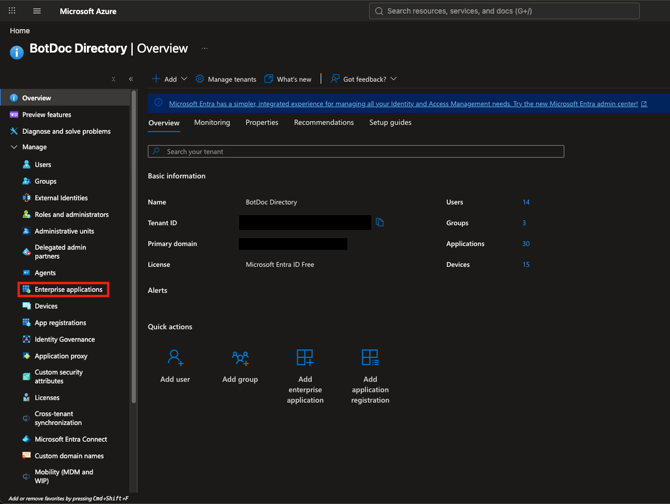
Create a new application
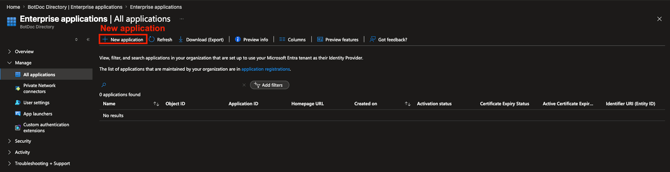
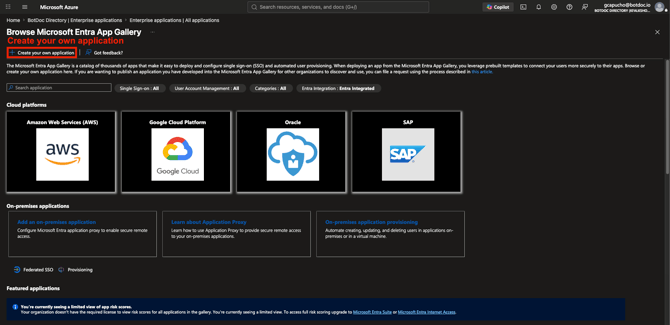
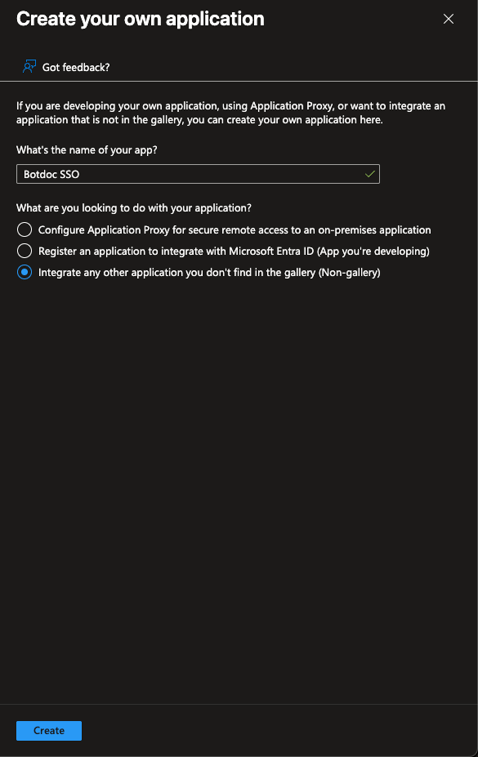
Click on New application, then Create your own application. Provide a name (for example, Botdoc SSO), and click Create.
Start the SAML setup
Inside your new application, go to Single sign-on and select SAML.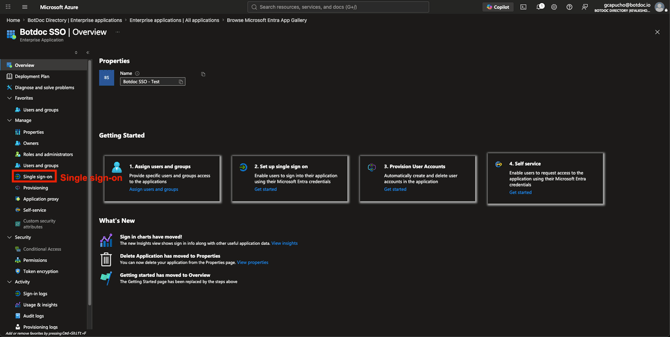
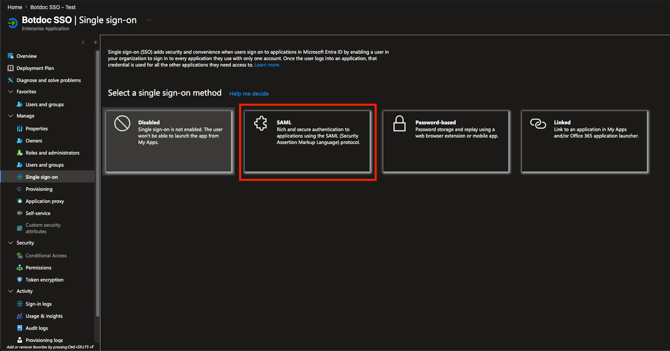
Fill in the Basic SAML Configuration
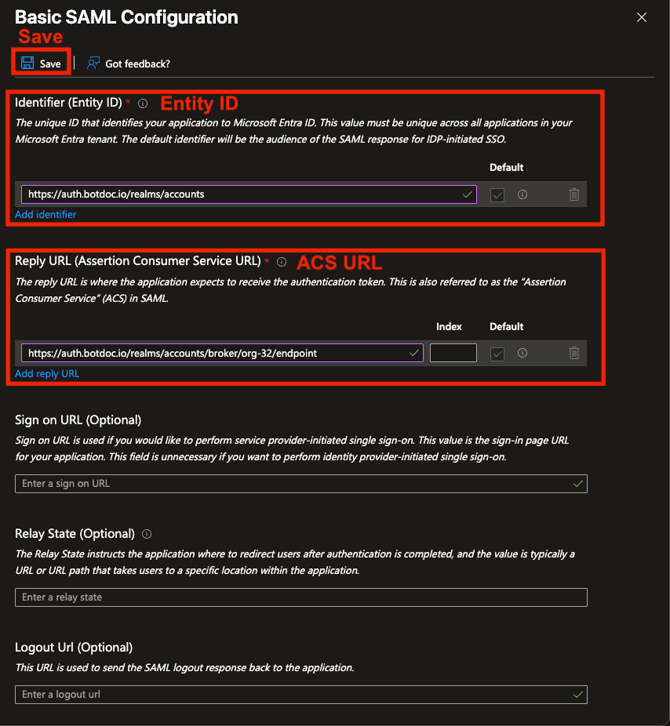
Click on the Edit pencil in the Basic SAML Configuration card and enter the values from your Botdoc SSO Configuration screen:
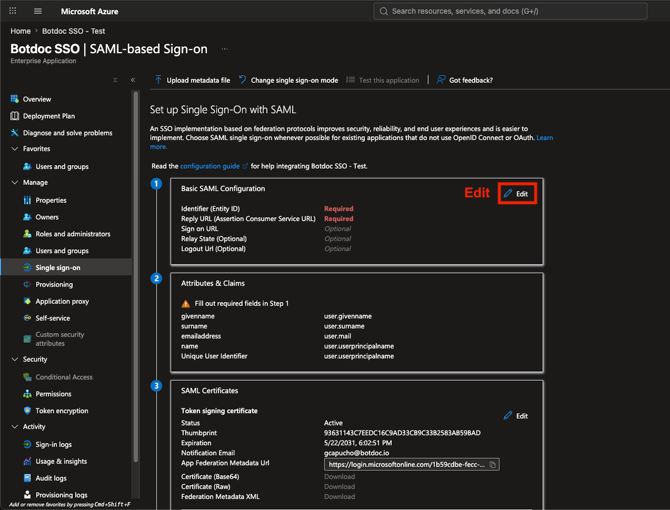
- Identifier (Entity ID): paste the Entity ID provided by Botdoc.
- Reply URL (ACS): paste the ACS URL provided by Botdoc.
Attributes & Claims
In the SAML setup screen, open Attributes & Claims. Azure's defaults already send what Botdoc needs — leave them as they are (The claims start with http://schemas.xmlsoap.org/ws/2005/05/identity/claims):
| Field in Azure | Default value — keep it |
|---|---|
| Unique User Identifier (Name ID) | user.userprincipalname · format Email address |
| …/claims/emailaddress | user.mail |
| …/claims/givenname | user.givenname |
| …/claims/name | user.userprincipalname |
…/claims/surname |
user.surname |
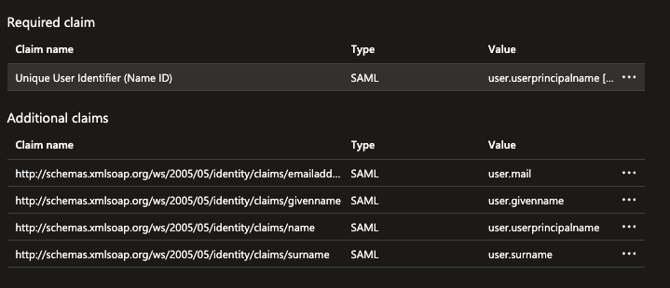
Make sure each user has a First name and Last name in their Entra profile. Empty fields are dropped from the assertion and the login could be rejected.
Download the Federation Metadata XML
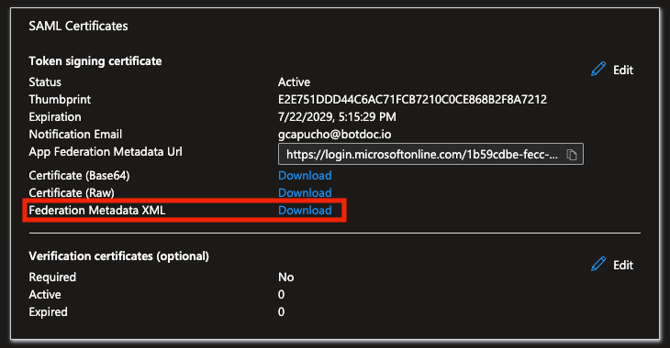
In the SAML Certificates card, locate Federation Metadata XML and click Download. Save the .xml file, you will upload it to Botdoc.
Assign your users
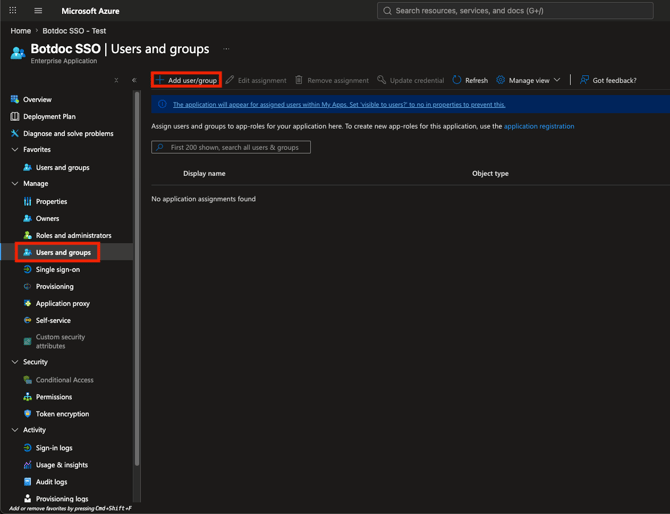
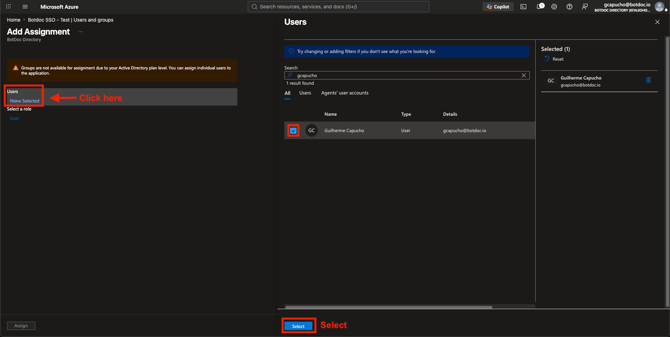
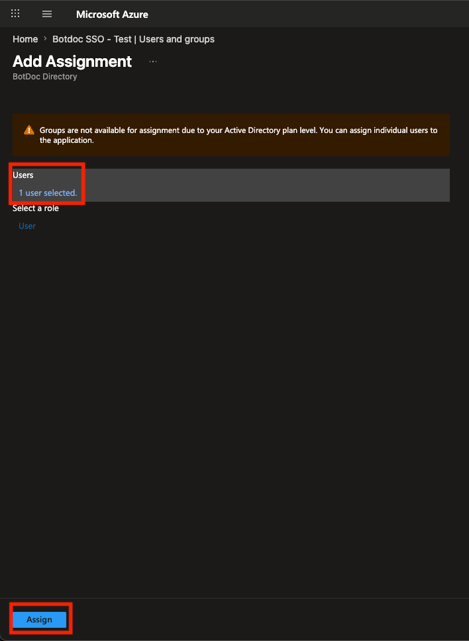
Go to Users and groups → Add user/group, and assign the users allowed to sign in through SSO. Only assigned users can authenticate.
Upload the metadata to Botdoc
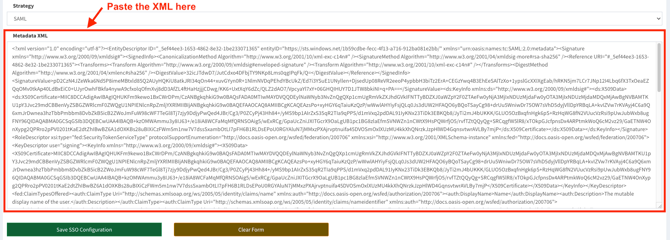
Return to the Botdoc SSO Configuration screen, paste the Federation Metadata XML file, and save.
To test, open the Botdoc login page, click Log in with Single Sign On. You should be redirected to Microsoft and returned to Botdoc already signed in.
Troubleshooting SSO sign-in
| What the user sees | Most likely cause | Fix |
|---|---|---|
| Returned to the login page, or "invalid email or password", after authenticating with the IdP | The IdP didn't send an email | Name ID isn't in email format, or the email claim is sourced from an empty attribute |
| Asked to "review / update your profile" | Email or name missing | Populate First/Last name; confirm the email claim has a value |
| First and last names appear swapped | givenname / surname sources are inverted | Set givenname ← user.givenname and surname ← user.surname |
| Works for some users, fails for others | Those users have empty mail / name fields in the directory | Fill the directory fields, or source the email from the UPN |